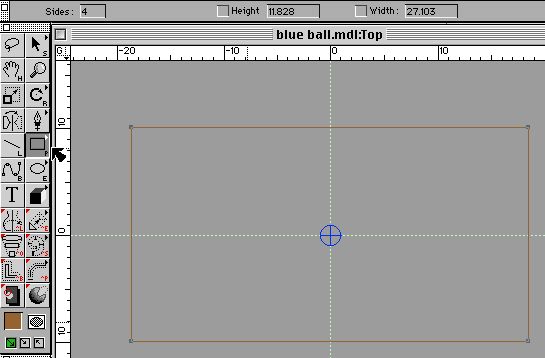
Figure 5-1. The rectangle tool is used to draw a flat 2-D plane that is used as the floor.
Having an object move across the screen is fine, but 3DJoy is much more powerful than what was done in the last chapter. Here we'll add a floor to our model, and then change the ball's properties so that it will bounce against the floor.
The first step is to add a floor. To do this, start the Modeler Module and open the "blue ball" model that was created earlier. Notice that the ball has not changed it's position even though we caused it to move in the Animation module.
First change the color of the soon to be created floor. (Why have it the same as the ball!) Double-click on the (blue) color box to change the color. I'm not too creative so I'll choose brown.
Next, it will probably be necessary to zoom out quite a bit to give yourself some room to work. Having the top ruler show -20 to 20 is plenty. After zooming out the view in the Top and a Front views, choose the rectangle from the toolbar and then click and drag to create a rectangle in the Top window. This is shown in Figure 5-1. When the rectangle is drawn in the Top view, it is located on the x-z axis plane.
Figure 5-1. The rectangle tool is used to draw a flat 2-D plane that is
used as the floor.
You can look at your freshly made floor in the Angled window. You'll need to zoom out to get a good look. Remember, click and dragging changes the angle, holding the "option" key down while dragging slides the view, holding down the "command" (open apple) key and dragging zooms in and out.
If your floor isn't showing up as a solid object, you will need to look at the floor's Object Information box. Double click on the rectangle in one of the views or in the Groups window Make sure that the "Filled/Capped" checkbox is checked. You can also rename the object from Rectangle 1 to Floor here. Then click on the O.K. button. If nothing seems to have changed, try redisplaying the views by choosing the Re-display option in the Windows menu or by pressing command-d.
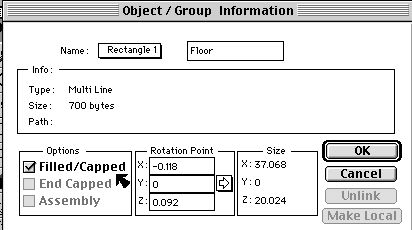
Figure 5-2. Make sure the Filled/Capped box is checked.
After getting your floor to look good, save your file and then switch to the Animation module.
Attributes are property modules that you add to an object, group, or folder that specify how that item responds to other objects in the virtual world. The main Attributes classes are Animators, Textures, Shaders, and Sounds. The Attributes window is displayed by selecting the Attributes choice in the Windows menu or by pressing command-2. The Script window displays a red square at the time (where the red triangle is) when you add an Attributes item to an object.
To add an Attributes item to an object drag the animation property, texture, shading, or sound icon into the Attributes field of the object's information box.
The first Attribute that our ball needs is Gravity. Figure 5-3 shows the blue ball's information box with the Gravity Attribute. Attributes are not activated, and the red square does not appear, until the object's information box is closed. If you play the movie in the active camera window at this point you should see your ball move to the left and fall down (through the floor!)
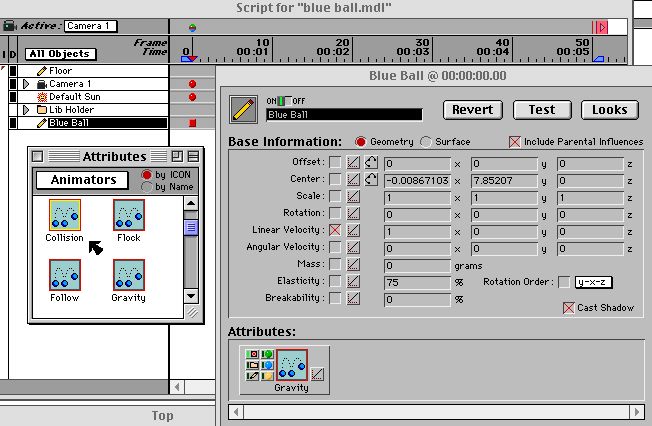
Figure 5-3. Adding the Gravity Attribute. Notice the red square in the
Script window.
Remember to have your Script set for 5 seconds otherwise you'll be waiting for a while after the ball falls out of the view.
If the ball seems to fall too slowly, you can increase the gravity. To do this, set the triangle time setting back to zero, double click on the Blue Ball object, then double click on the Gravity box in the Ball's Attributes area. A dialog box appears and you can type in a new value for gravity in in/sec^2. For this example 10.0 is a good value. If the number is too high, and the calculation steps (one calculation per frame) are too large, then problems can occur such as items passing through walls or strange jumping motion. The "Custom" item in the dialog box is a pull down box which contains pre-set gravity values of different planets.
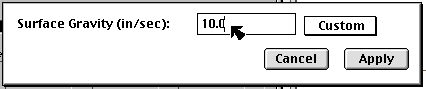
Figure 5-4. The gravity dialog box can be set to any value. The gravities of
different planets are listed in the pull down box on the right.
Note: Another way of moving an object is to use the Wind Attribute. This item can be changed from a "Light Breeze" setting to "Planetary Impact."
At this point, you're probably wondering about the hollow looking floor. That is, if you can even see the floor. Adjust the camera view so that both the ball and the floor can be seen in the Active Camera window. The floor will remain only an outline, but to see it with some solidity, take a rendered picture using the Phong render or ray tracer and you will see a filled in floor.
Having the ball fall is good, but to make it more interesting, we want it to bounce. First we need to add the Collisions Attribute. Gravity needs to come before (displayed to the left of) Collisions otherwise things won't work right.
The collisions box only needs to be included in the Ball's information box. If the collisions module is included in the Floor's information, the floor will move after the ball hits it.
After you close the Ball's box and then play the movie in the Active camera window, you will see that .... the ball still falls through the floor!
The missing link is a calculation process do determine the location of the objects at the different points in time. To perform this calculation, choose the "Re-Calculate Interactive" from the Action menu or press command-y. The most visible effect is that the ball and the time indicator start moving. Each time the ball collides with the floor, a green circle appears in the Script window.

Figure 5-4. The Script window now has green circles after using the
Re-Calculate Interactive from the Action menu.
You can change how high the ball bounces by changing the ball's Elasticity. 100% causes the ball to return to it's original height. 0% causes the ball not to bounce at all. Once the motion looks good in the Active Camera window, you can make a movie by clicking on the Movie Camera icon. Using the Phong Render or ray tracer provides a nice floor that the ball bounces off of.
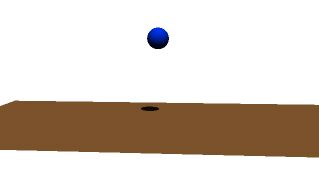
Figure 5-6. This is an image of the ball and floor so far. (The Sun was
adjusted to get the shadow on the floor.)
That's it! We have a bouncing ball. However, there are several neat features that we can add to our bouncing ball. The next chapter will add a bouncing sound each time the ball hits the floor, the following chapter will add additional balls, and the final chapter will show how change the surface properties such as colors, transparencies, and reflection, and how to map pictures to the balls and floor.
©1999 Steven Sahyun - sahyuns@ucs.orst.edu