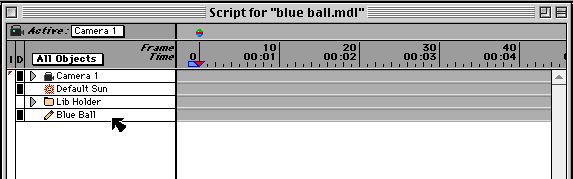
Figure 4-1. This is the script window showing the time-lines for the camera, light source, and the ball.
OK, we know how to make an object and we know how to make it look like something that is more than just a wire frame. Now its time to make the thing move.
First we need to have a brief discussion about the Script Window. This is the window in the upper left corner of the screen and looks like that in Figure 4-1. There are several items displayed in this window that are important to notice.
Figure 4-1. This is the script window showing the time-lines for the
camera, light source, and the ball.
The most important feature is the listing of all of the objects in the scene. Each object has a corresponding track leading to the right. This track is the object's time-line, and any important changes that happen to the object will be indicated by colored circles or squares on this time-line.
Another important feature is the clock, or time indicator along the top of the window. This shows the time in two formats. The upper values indicate the frame number, while the lower values indicate the movie's play time. The little hatch marks indicate individual frames of the movie. As the movie progresses, the little red triangular time marker will move to the right if you are playing the scenes events forwards, or it will move to the left if playing events backwards.
If you change something in the scene, it is important to be aware of where the little red triangle is! Changes to the scene happen from the time indicated by this marker and progress onwards. Events at an earlier time will remain unaffected. You can move the red time marker by clicking and dragging it to the desired time or by clicking on the hatch mark at that time.
The default time of play is set for 240 frames at 10 frames per second (for a total play time of 24 seconds). When trying simple things, this is too long and we really want to shorten it a bit. Also, on older computers, 24 seconds of animation can take a long time to calculate. There are two ways to adjust the play time. The first is to scroll the window to the right and find the blue trapezoid. You can change the animation's ending time by clicking an dragging this object. Next you will need to click and drag on the top-most grey triangle on a red background. This adjusts the animation's total time.
Note: if you want to change the play time in this manner, you need to move the end time indicator before the total time indicator or you could loose the blue trapezoid that marks the End Time.
A better way for adjusting the play time is to use the "Animation Settings" item under the Edit menu. This displays the dialog box shown in Figure 4-2. You can control the total play time as well as the frame rate from this box; simply type in the new values. I have adjusted the size of the Script window in the figure to show the full 5 second time-line.
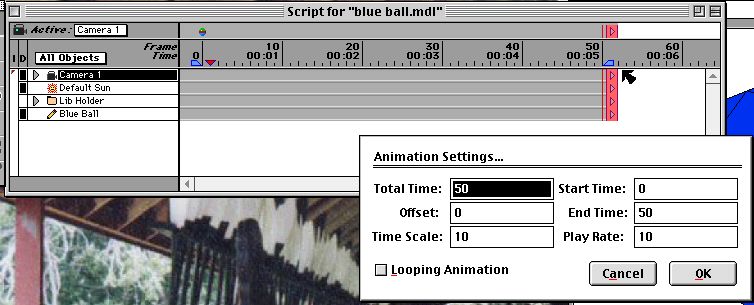
Figure 4-2. I have adjusted the "Total Time" and the "End Time" to both be
50 frames. The Play Rate indicates 10 frames per second so the movie will
be 5 seconds long.
Double clicking on an object will bring up its information box. These boxes can be a bit intimidating at first sight with the large number of choices. First we will explore the Location property fields for Camera 1 and the Default Sun. Then we'll look at the properties for the Blue Ball.
When you change something in the properties box, a red dot appears on the timeline. The location along the timeline is determined by the position of the red triangle and the time is displayed in the property box's title. If you don't like the change that you've made, you can always single click on the red dot and get rid of it by pressing the "delete" key.
Double clicking on the camera in one of the three view windows, or in the Script window listing will call up it's Properties box. The two most important things in this box are the Location and Target fields. The Location indicates where in the virtual world the camera is at the time indicated in the title bar, and the Target field is where the camera points. You can type in the exact location, or you can click and drag the camera in the view windows to a desired point and the Location values will change accordingly. The same can be done with the Target fields and its black display dot.
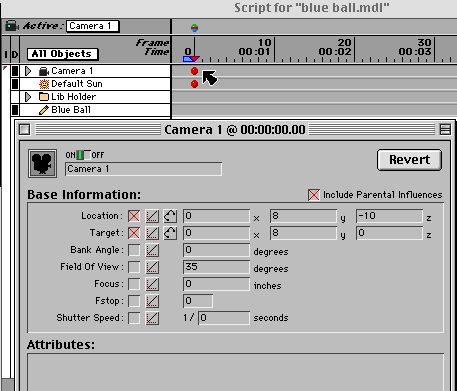
Figure 4-3. I have positioned the camera so that it looks directly at the
ball. Notice the red dots indicating that I have made a change to Camera 1
and the Default Sun's properties.
The Default Sun has a similar box. If you type in numbers that position the camera outside the area seen in the View windows, you can always back up with that window's zoom button.
If you click on the camera when the time indicator is not 0, and you choose a new location, the camera's position will smoothly move to that new position during the movie.
Now for the moment you've been waiting for! (Drum-roll please.) How to make our ball move! Just like the Camera and Sun, the Ball has it's own properties box. The difference is that this one is a bit more involved, and can set just about anything you can think of. For now we'll just be concerned with one field: Linear Velocity. The Linear Velocity field gives objects translational motion (forward, back, up, down, left, right) and should not be confused with the Angular Velocity field which makes things turn.
To make the ball move from left to right, I adjusted it's Linear Velocity to be 1 in/sec in the x direction, as seen in figure 4-4.. After modifying the values, you need to make sure to check the box to the left, otherwise the change does not take effect. Also, the change is not recorded until the properties box is closed. After closing the box, you can play the animation in the Active Camera window to see if this is the motion you want.
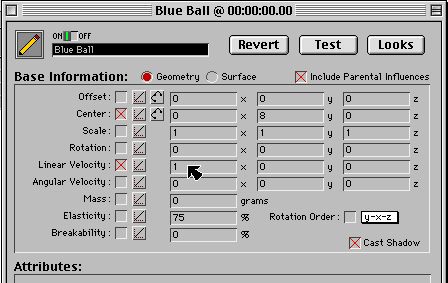
Figure 4-4. I have given the ball a Linear Velocity of 1 in/sec in the x
direction. This causes the ball to move from left to right.
Now a ball moving from left to right isn't very exciting, but this is just an example. The object could be a balloon, spaceship, or unicycle but the basic idea of making the thing move is the same. To make more complex movement, it is generally more useful to position the object (by click and dragging it) to desired locations at key times. 3DJoy will interpolate the movement so that it gives a smooth animation sequence.
Now that we have an object we like, and the motion we want, lets make the full rendered movie. To do this, make sure that the Render Style box is set to Phong Render (or ray tracer, or Quick Render depending on your taste and time.) You can check the object's lighting by taking a picture with the Camera button. If it isn't quite what you want, then move the Default Sun to a better location. Make sure you do this at time 0 unless you want your sun to move.
Now, click on the Movie Player button. A dialog box will appear asking for a filename and location. Press the Render button and the computer will set to work creating your masterpiece. After it is finished, a QuickTime movie window will be displayed and you can play the final product.
Note: You can open and play this animation using QuickTime's MoviePlayer. If you have version 2.5 or have upgraded to QuickTime Pro, you can then save the movie so that you can view it without starting 3DJoy. If you have ResEdit, you can change the Creator type from VDoz to TVOD to accomplish the same thing.
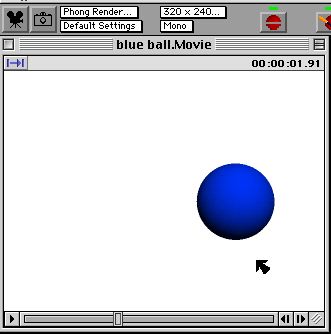
Figure 4-5. The moving ball!
Next we'll make things a little more complicated and have the ball bounce against a floor.